1. Login to your account
By going to the login page. If you do not have an account yet, you can create one for free here.
2. Create a menu
In the submenu Edit menu content, you should see the following window:
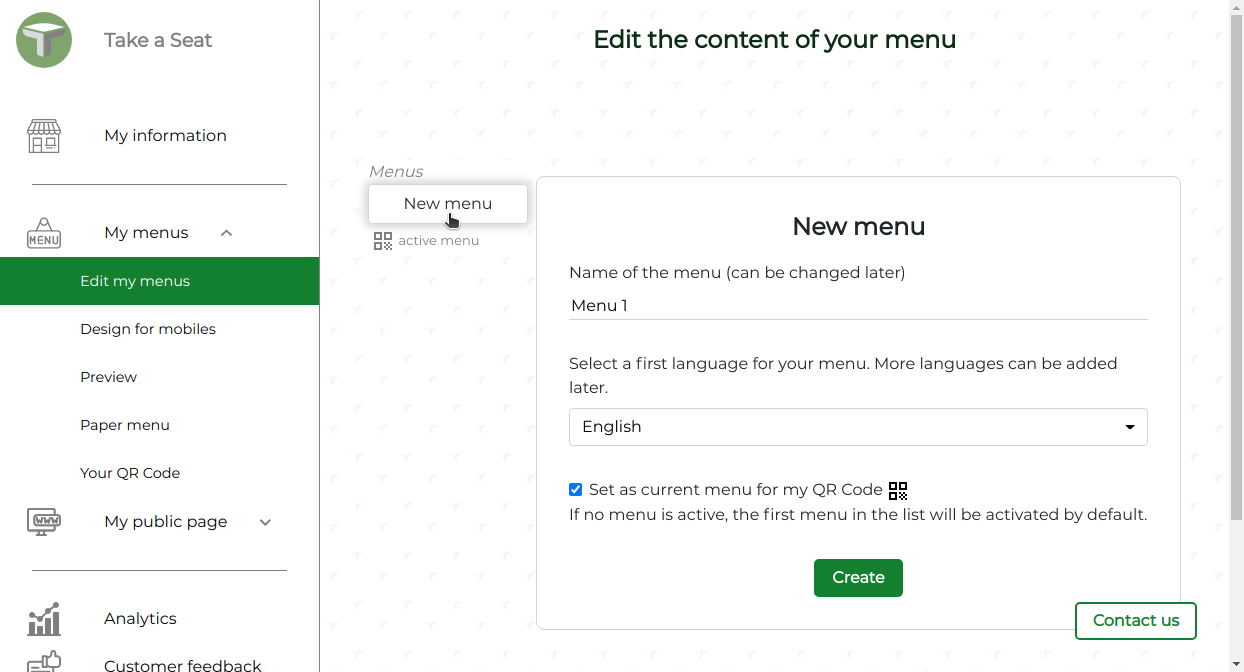
In this window, you can:
- Customize the name of your menu. This can be changed later.
- Select the language of your menu. More languages can be added or removed after the menu has been created.
- Mark the menu as active. If this is your only menu, it is active by default. If you have multiple menus, you need to choose which menu to display to your guests by making it active.
Click on Create.
3. Add items to your menu
You should now see two options:
- Demo menu: this will fill your menu with examples of dishes.
- Insert section: this is to create a menu section such as "Starters", "Main course" etc. from scratch
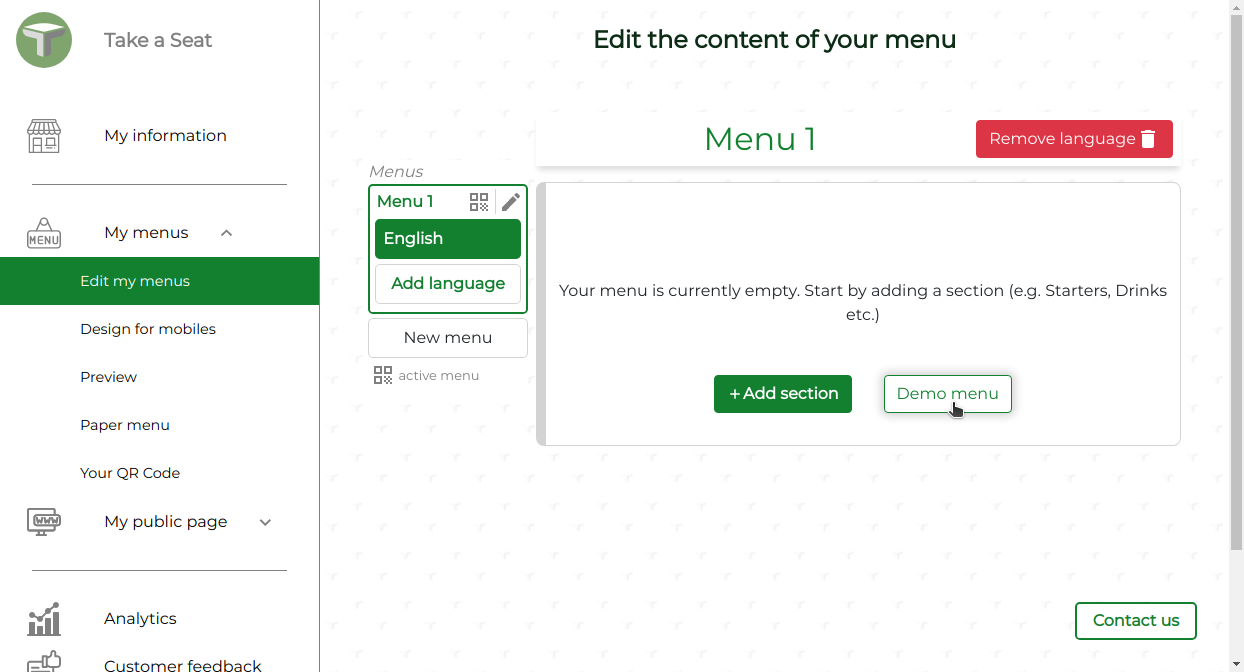
Click on Demo menu
You should now see a menu with various items:
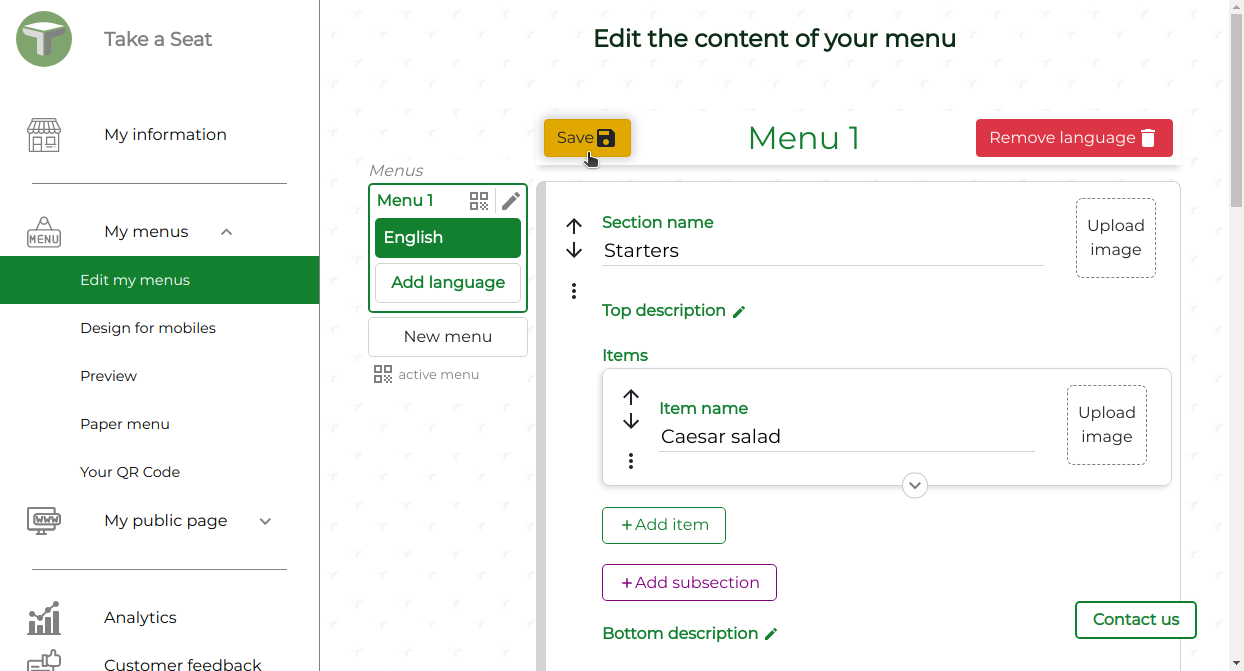
Click on Save
4. View your menu
The menu you just created should automatically be accessible online. To access it, you can either:
- Click on the submenu Preview.
- Scan the QR Code from the submenu My information.
- Go to your menu URL using the format: http://site.takeseat.io/XXXX-XXXX-.../menu where XXXX-XXXX-... is your technical identifier found in the submenu Your identity
5. Share your menu
Your menu is ready to be shared. If you have not done so already, check out our tutorial on sharing your menu via a QR code.
Congratulations! You have created your first menu and you are ready to share it.
If you need any assistance, please let us know at [email protected]. We will gladly help.